使用stm32cubemx创建工程
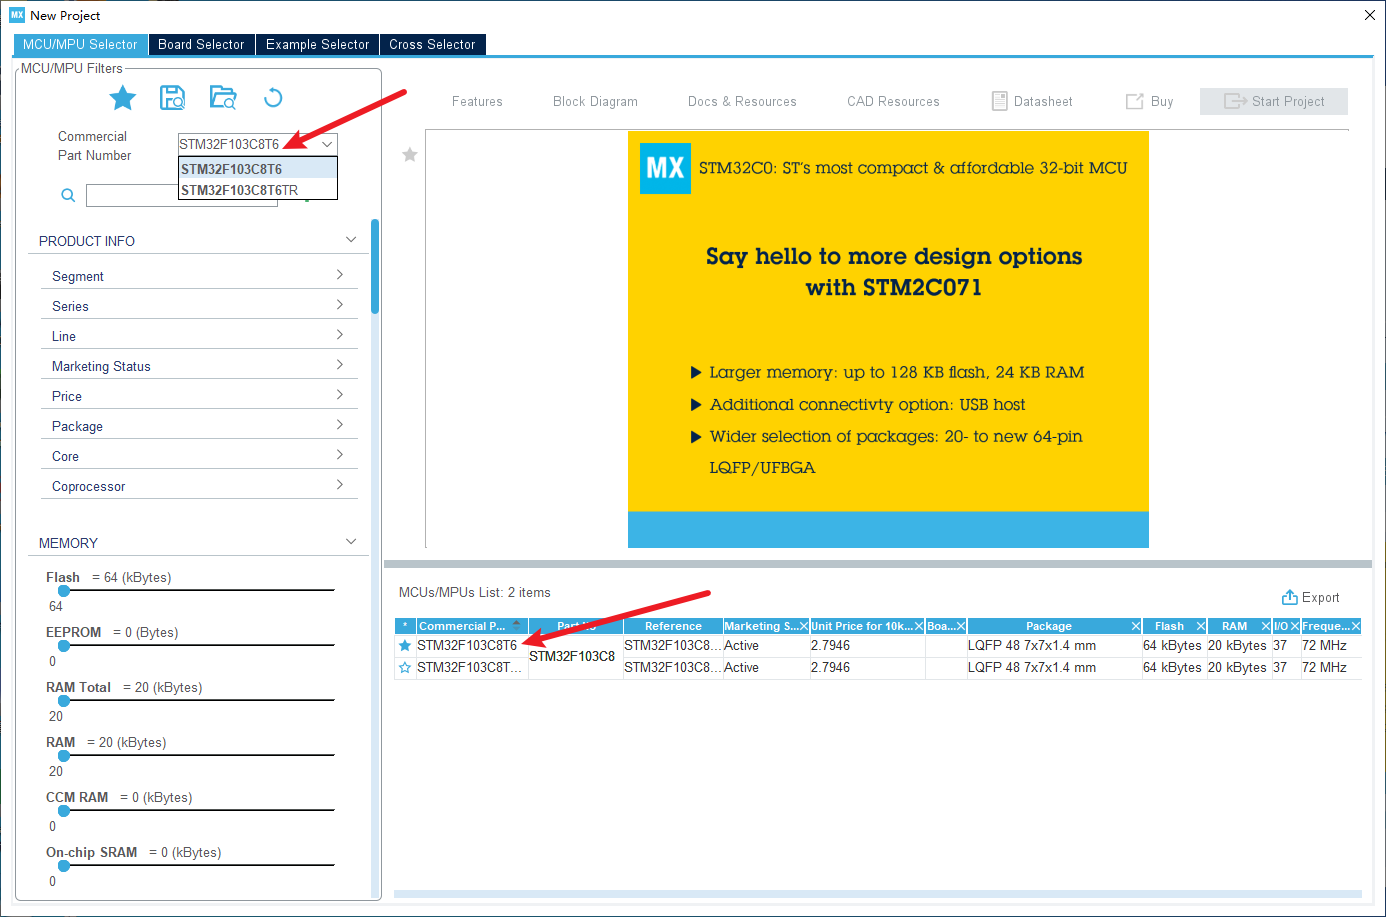
1、新建cubemx工程

2、选择stm32f103c8t6,请尽量使用一致的开发板,否则后续的步骤可能会不一致
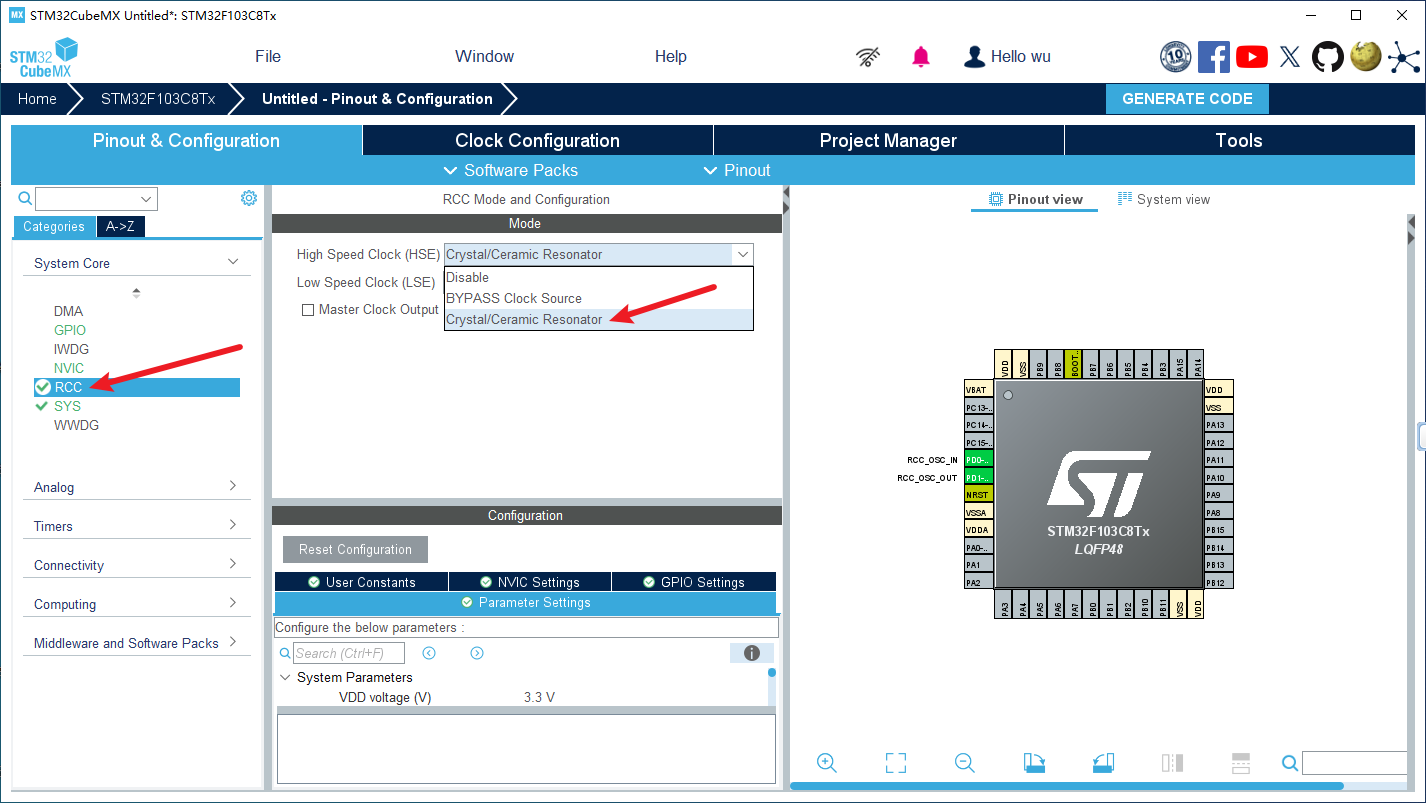
3、点击RCC,设置外部高速时钟(HSE)
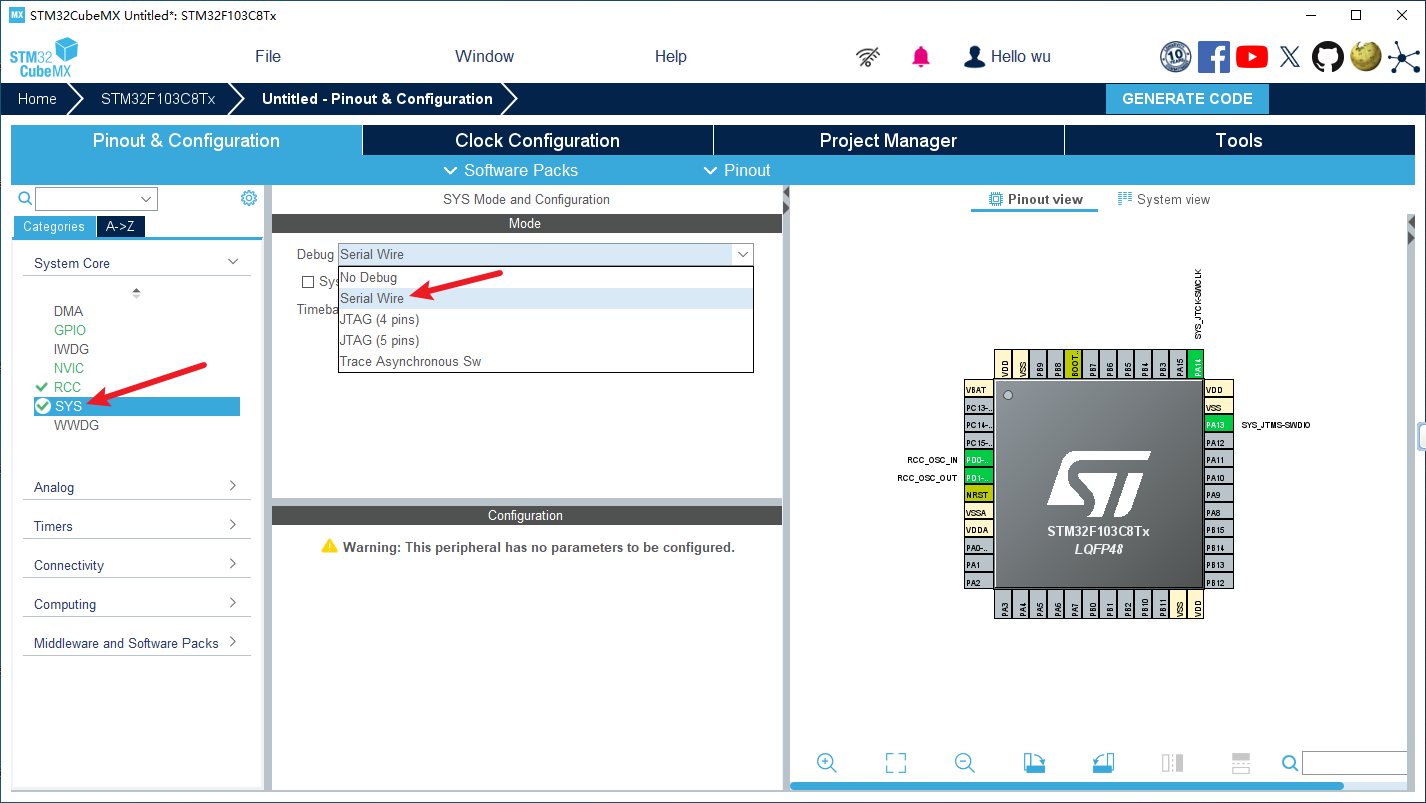
4、点击SYS,Debug选择 Serial Wire
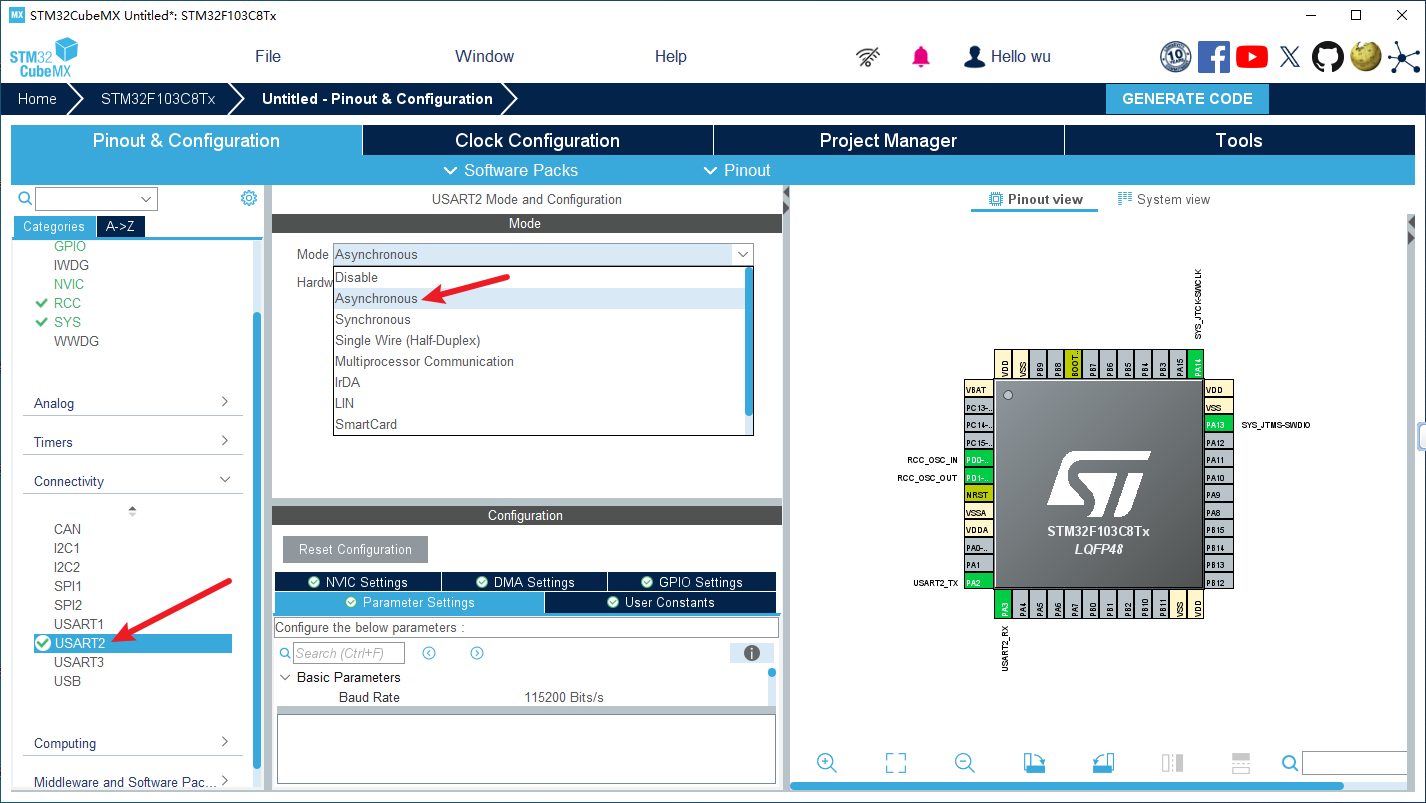
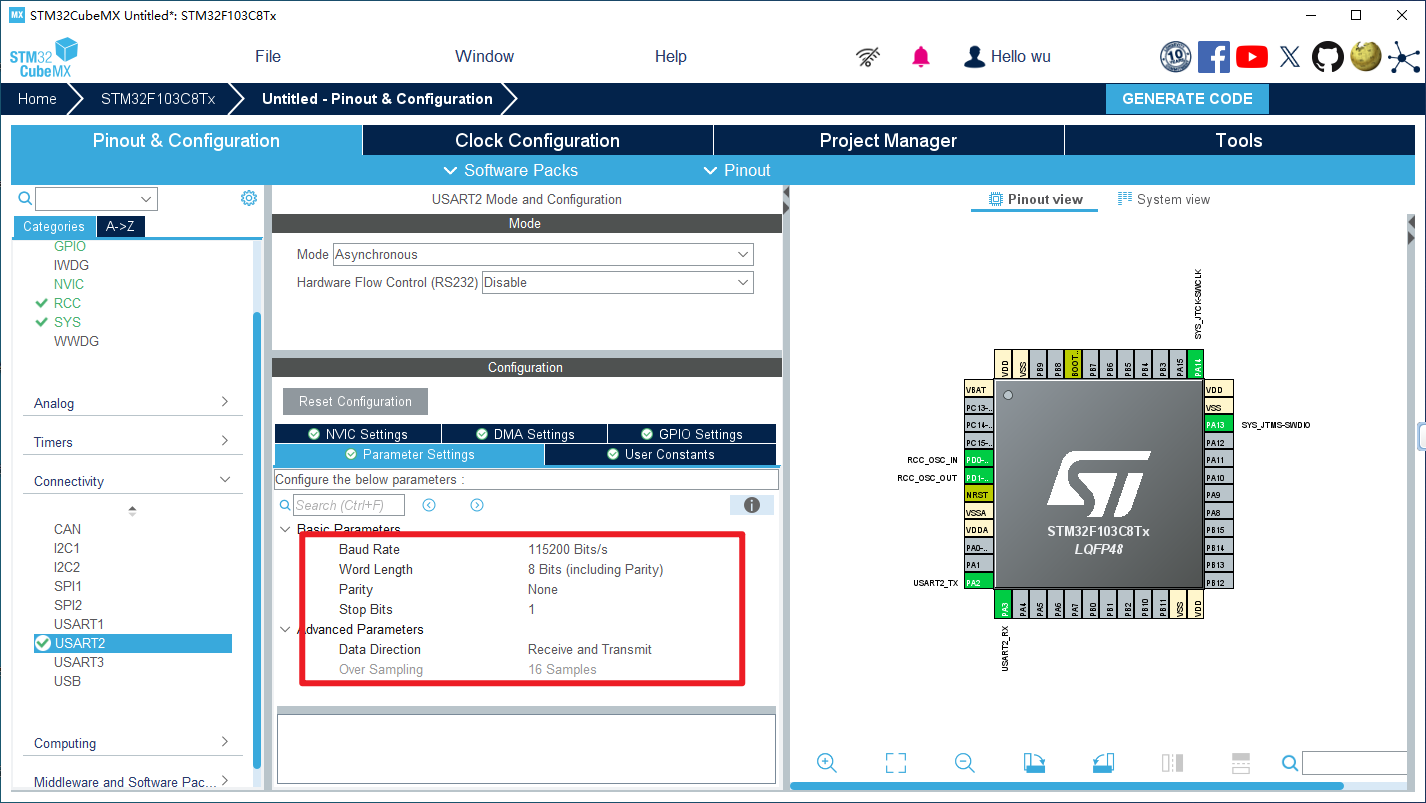
5、USART2设置为异步(Asynchronous)
6、波特率和相关的设置使用默认的设置就可以了
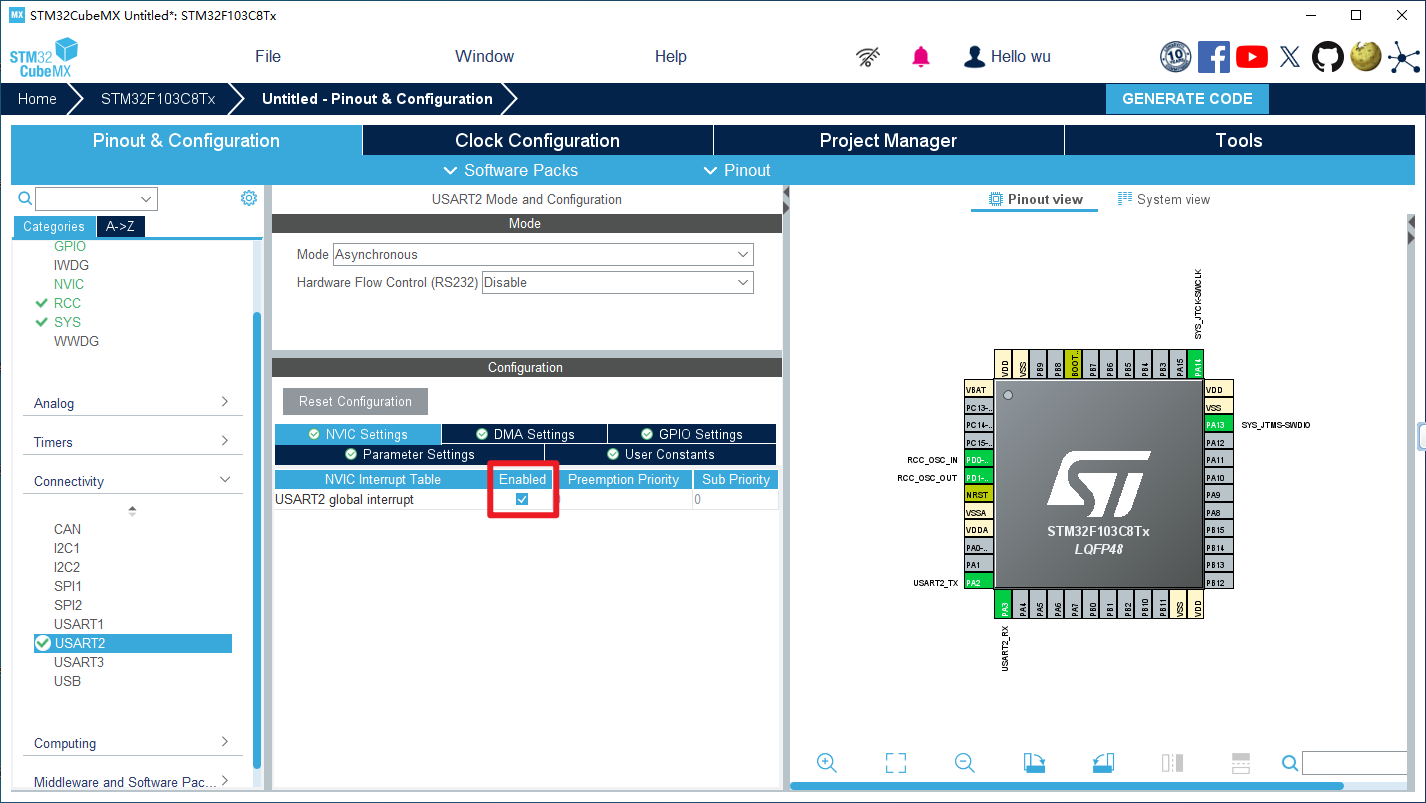
7、在NVIC Settings里开启USART2的中断
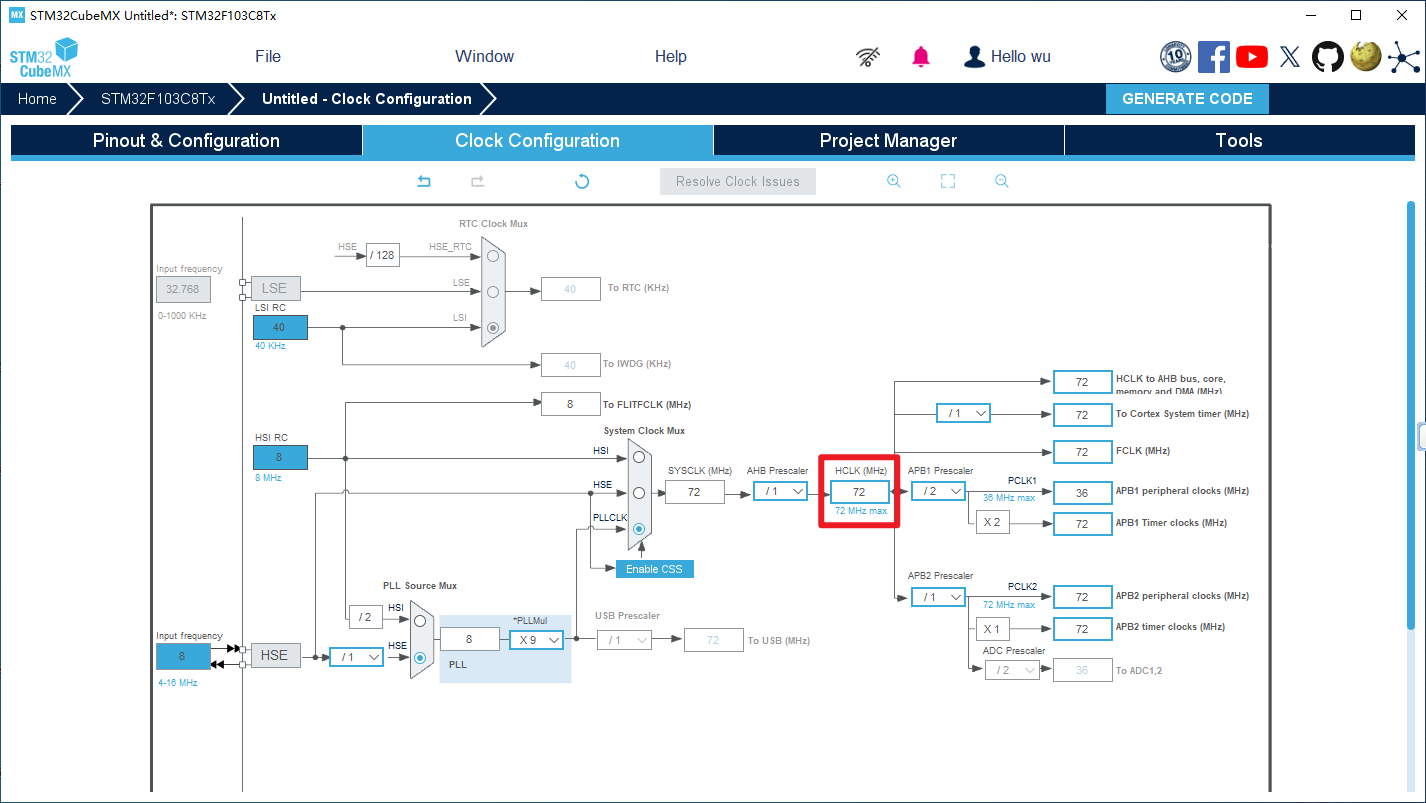
8、切换到时钟设置页面,将这里设置为72,会弹出弹窗,一路同意即可
后续使用stm32cubeide开发请参考 使用stm32cubeide(HAL库)开发
后续使用keil开发请参考 使用keil5(MDK)开发